Do you have one or more hospitality businesses and Facebook pages or Instagram accounts? And do you want to manage your pages and ads from one place, or perhaps outsource them? Then it makes sense to use Facebook Business Manager. To this, you link as many pages and ad accounts as you want. And it's free too!

Why a Facebook Business Manager account?
With Facebook Business Manager, you keep an overview. You link all your pages and ad accounts to one platform. Even if you only have one page and/or ad account, this is useful. It also allows you to target advertising and analyse campaigns.
The benefits of Facebook Business Manager
- All your pages and ad accounts are managed from one place. Nice and clear, right?
- You only need your Facebook account to log in. That way you don't have to remember all those other passwords all the time 😉
- You post on Facebook and Instagram without switching between accounts all the time. That saves you time!
- Advertise to specific target groups and analyse your campaigns. Achieve even better results this way.
- You easily add users and determine what role they have. Useful for outsourcing tasks to employees or partners.
No more booing on Facebook and Instagram
From your Facebook and Instagram page, it is also possible to boost your posts. Perhaps you've tried this before. If so, you probably noticed that your options are quite limited. So we also advise against this.
From Facebook Business Manager, you can access Facebook Ads Manager. From here, you can advertise to specific audiences in a much more targeted way.

How to create a Facebook Business Manager account?
Before you start creating your Facebook Business Manager account, you will need a few things:
- Facebook company page
- Instagram business account
- Business e-mail address login details
- Credit card details
Do you have everything ready? Then let's get started! Follow these steps to set up your Facebook Business Manager account properly.
Step 1: Create an account
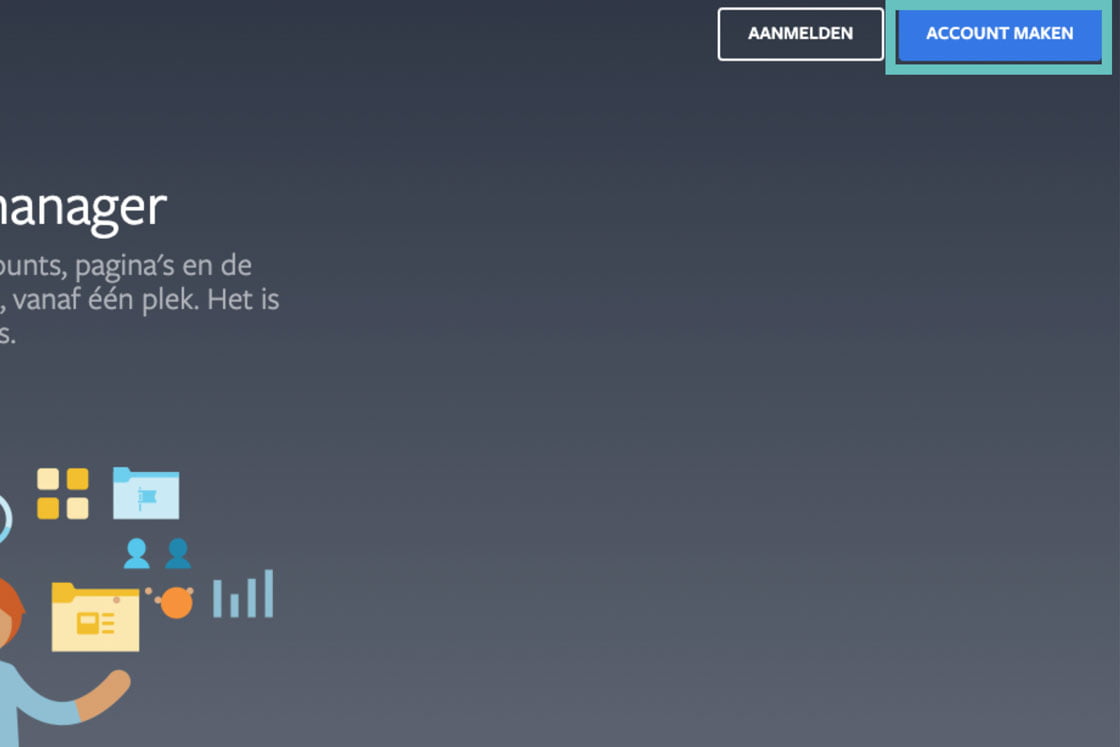
Go to https://business.facebook.com/ to create an account. Log in with your personal Facebook account. Note that this must be linked to your Facebook business account. Next, give your Facebook Business Manager a name. Easy, of course, is your company name or an umbrella name if you want to house several pages here.

Step 2: Add a payment method
Before we start linking pages and ad accounts, it is important that you add a payment method. Via 'Business settings', go to 'Payment methods' and choose 'Add'. That way, at least you have your administration in place!

Step 3: Linking advertising accounts and Facebook page
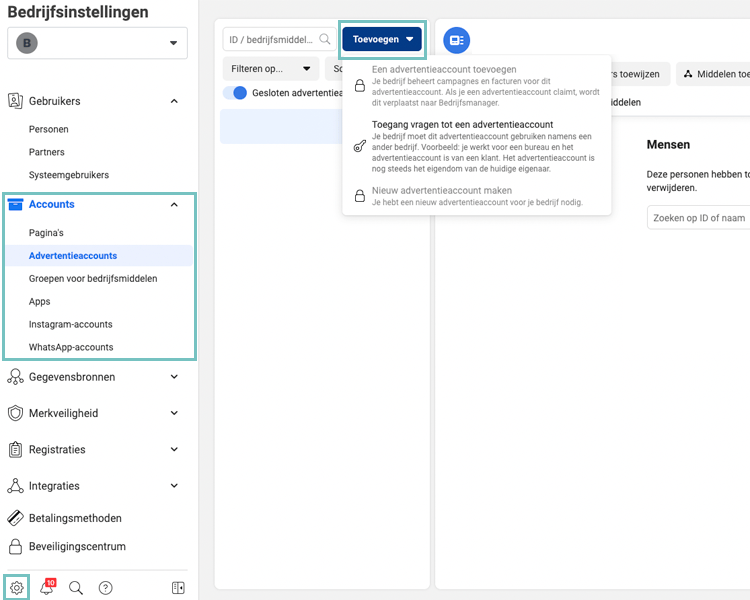
Now it's time to link your ad accounts. You do this through 'Business settings' and then choose 'Advertising accounts'. You have 3 options:
- add,
- ACCESS QUESTIONS,
- create new ones.
Do you already have an existing ad account? Then add it here. Don't have an ad account yet? Then create a new one. Do you already have an ad account, but no access yet? Then ask for access.
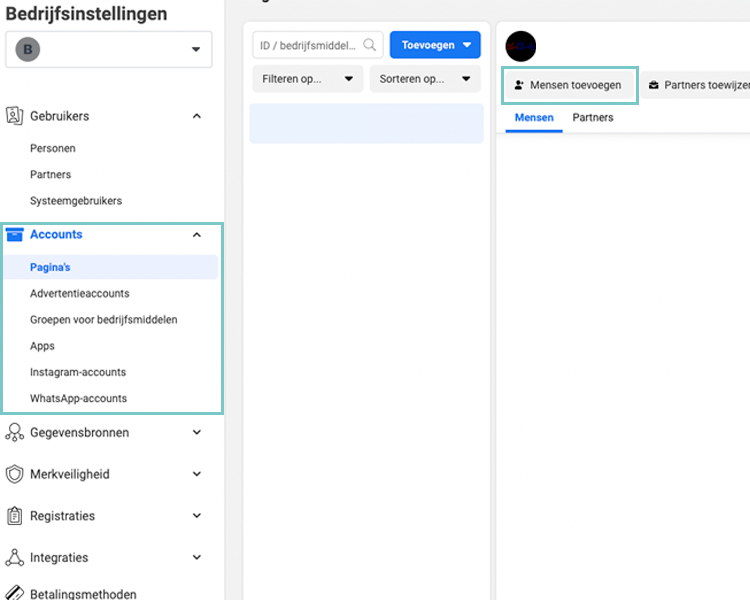
The above also applies to adding your Facebook pages. You add these via 'Company settings' and then 'Pages'.

Step 4: Add Instagram account
Through 'Business settings' and 'Instagram accounts', add your Instagram account. If you click 'Add' and then 'Link Instagram account', a new screen will open. Log in here with your Instagram account. Your account will then be automatically linked to your Facebook Business Manager.

Step 5: Adding users
The nice thing about Facebook Business Manager is that you can also give other people access. For example, an employee who manages your Facebook page or a marketing agency that optimises your ads.
Under 'Users', choose 'persons' to add employees. Choose 'partners' to add an agency, for example.

Step 6: Divide roles
The users you add have different roles. The highest role is administrator. But you can also entrust only specific tasks to someone, such as publishing content on a page or creating ads.
You assign these roles from 'Business settings' via 'Pages' for your Facebook pages, via 'Instagram account' for Instagram and via 'Advertising accounts' for ads. Add people here and assign appropriate roles.

Step 7: Verify your domain
Before you get started with advertising, it is important to verify your domain. This is because since the iOS 14 update, there has been a change in how Facebook stores statistics. Due to privacy reasons, Facebook no longer measures everything on your website.
If you verify your domain in Business Manager, at least the data from your campaigns comes through successfully. There are three ways to verify your domain within Facebook:
- DNS authentication
- HTML upload
- Meta tag verification
Go to 'Company Settings' and then under 'Brand Security' choose 'Domains' to verify your domain easily and quickly.

Ready to manage your pages and ads!
Now that you have Facebook Business Manager set up, posting content and managing your ads is even easier and more effective. Want to get even more out of your ads? Read how to make a successful social campaign makes.


